When I was younger, there was only one pasta dish that my grandmother cooked that I absolutely despised. This dish is called Agli e Olio. Basically, it is just a pasta dish cooked with a heafty amount of sauteed garlic and olive oil.
Being a white pasta lover, one wouldn't see a problem with me liking this dish as it does not include tomato sauce. However, my grandmother would always add in capers-the part of this dish I disliked with a passion.
I would meticulously pick out the capers one by one until there was no trace of them in my pasta before I began to eat dinner. Eventually, picking out the capers became too much of an effort and I started to eat them because of my laziness. Granted, I did not like them at first, but after some time I decided "hey, these aren't so bad after all". Now, I love capers and look forward to making dishes that include them, which includes the one posted below!
It's funny how taste changes over time. While I have gotten MUCH less picky about the foods I eat (possibly because I've began to explore food and tastes on my own), I still choose to leave tomatoes and tomato sauce off of my palate. Perhaps one day I will eat and enjoy tomato sauce... just not today...
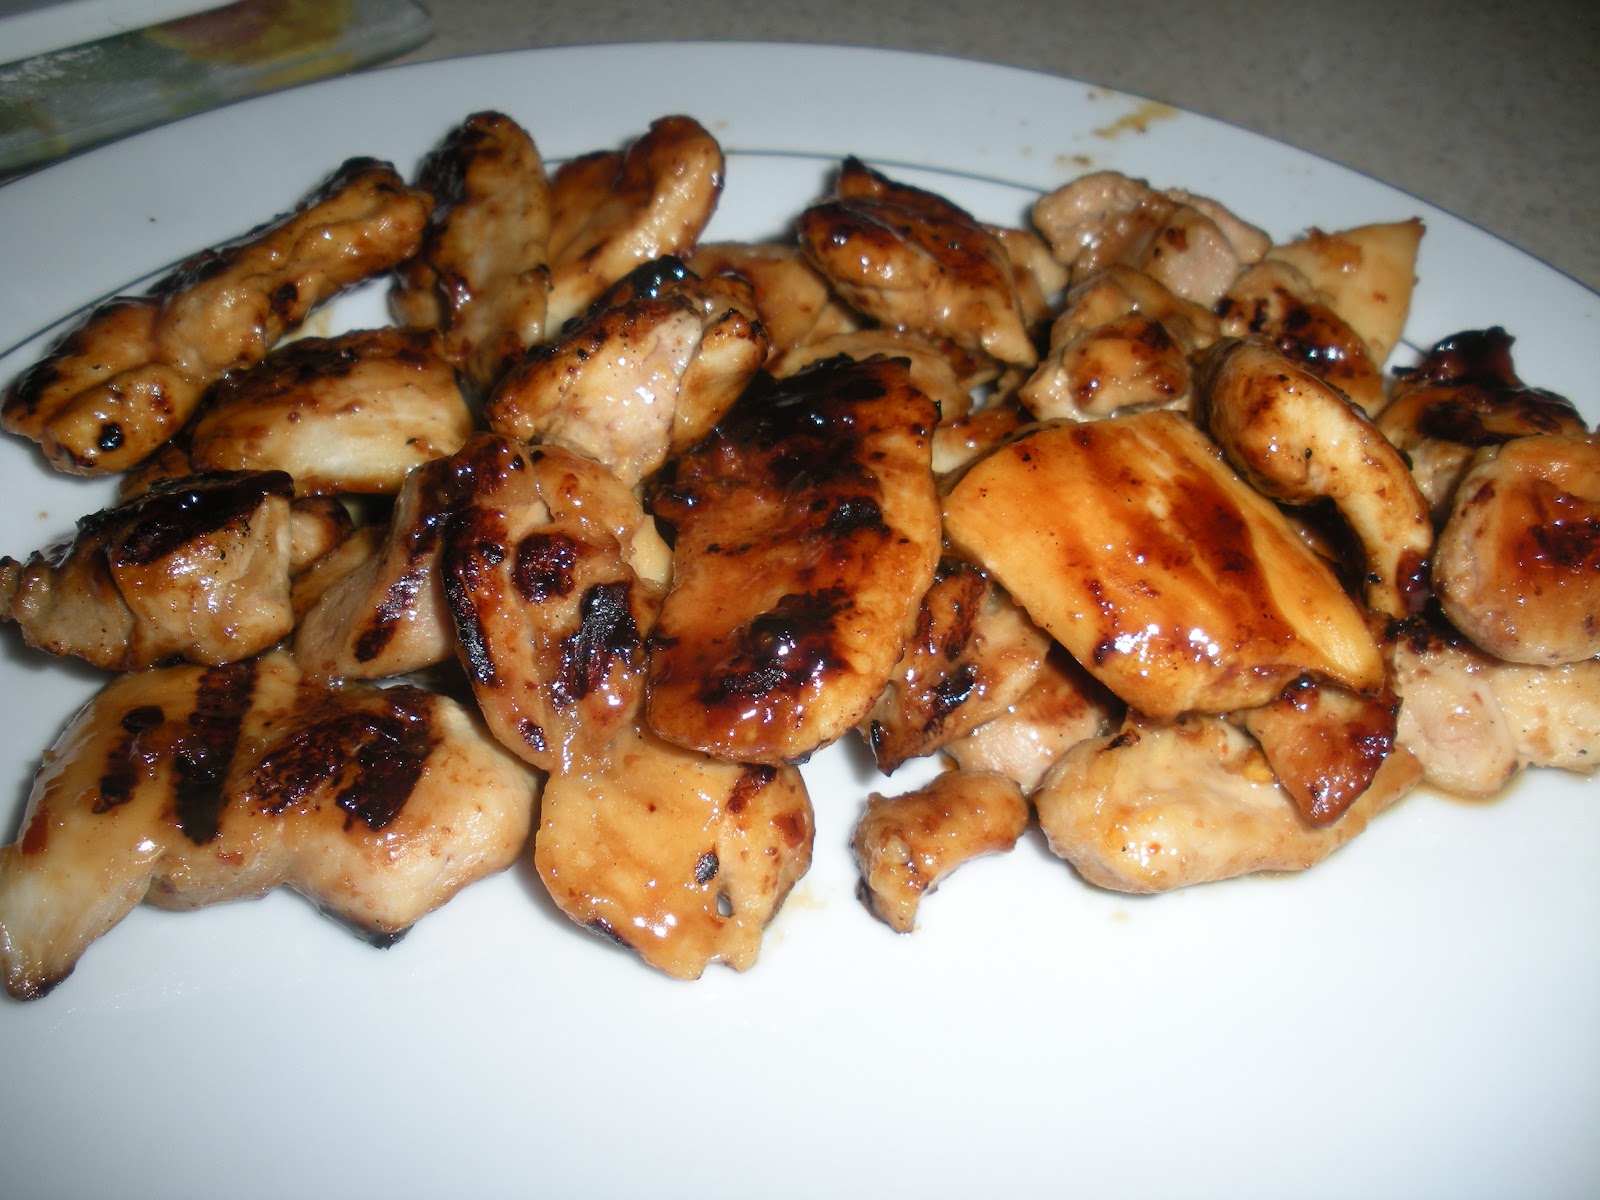
Chicken Piccata
Serving size: 2
2 chicken breasts, cleaned
half pound of pasta of your choice, I used angel hair
about 1/2 C flour, in bowl
2 tbs unsalted butter
3 tbs olive oil
1 clove garlic, finely chopped
1/3 C lemon juice, use a bit less if using fresh squeezed lemon
1/2 C low sodium chicken stock
1/4 C capers
1/3 C fresh parsley, chopped
salt and pepper
Bring a pot of water to a boil and cook the pasta according to package directions.
Meanwhile, lightly season the chicken with salt and pepper. Dredge the chicken in the flour.
Bring a large pan to medium high heat, melt the 2 tablespoons of butter with 3 tablespoons of olive oil and garlic. When the oil is sizzling, add the chicken and cook one side until browned, about 3 minutes. Flip the chicken and cook for an additional 3 minutes and remove from heat.
Add the lemon juice to the pan along with the chicken stock and capers. Bring the liquid to a boil, making sure to scrape up any browned chicken goodies that may have stuck to the pan. Reduce the heat to a simmer and return the chicken to the pan for an additional 5 minutes.
Transfer the chicken, sauce, and pasta to a serving dish, making sure to coat the pasta thoroughly with the stock sauce. If you need some extra olive oil, go ahead and add it now while you're mixing everything up. Garnish with fresh parsley and enjoy the delicious and easy meal you made!
Friday, September 13, 2013
Monday, August 26, 2013
Linguine con vongole
For some reason I have been on a seafood kick. This is very strange for me, because a couple of years ago, I would not have touched any kind of seafood with a ten-foot pole (besides shrimp and tuna fish from a can, that is). Almost everytime I've gone out to eat, I've been finding myself gravitating towards the seafood and ordering that. Very risky on my part as well.
Not to brag (okay, maybe I'm bragging a little), nothing I've ordered at a restaurant has tasted better than this one pasta dish I made with clams, shrimp, and scallops.
Shrimp and scallops I had no problem with...clams however... If you asked me 3 years ago to eat a clam, I would have laughed and thought you were joking. My boyfriend, being the adventurous eater that he is, convinced me to try it. And guess what? I love them! I love the saltiness, although I do warn that a grain of sand can throw you off at first if you chew too vigorously.
I'm so happy he convinced to me try it, because in addition to clams, he has helped me try many new foods that I've never tried before. I am also proud of myself for being brave enough to try things that once scared me. Hooray for trying new things!
Linguine con vongole (and shrimp and scallops)
1 pound pasta (linguine or angel hair)
1/4 C olive oil
4-5 teaspoons garlic, finely chopped
12 little neck clams (thoroughly cleaned from any sand debris)
1/4 pound shrimp
1/2 pound scallops
3/4 C white wine (Pinot Grigio or Sauvignon Blanc)
1 lemon, juiced
2 tablespoons butter
salt and pepper
1 C fresh parsley, chopped
sprinkle of red pepper flakes (optional)
Bring a large pot of water to a boil. Add the pasta, cook to package instructions, and drain well.
Meanwhile, heat olive oil and butter over medium flame in a deep saute pan. Add the garlic, red pepper flakes if desired, and saute about 2 minutes. Add clams, wine, and lemon juice. Cover the pan with a lid to allow clams to cook. Shake the pan periodically until all the clams have opened up--if some clams have not opened up, remove them from the pan and discard. Add the shrimp and scallops and cook until shrimp is pink and scallops are opaque throughout.
Add the drained pasta to the sauce in the pan, season with salt and pepper, and toss pasta until it is coated with the sauce. Extra olive oil may be used here if necessary. Garnish pasta with the freshly chopped parsley.
Not to brag (okay, maybe I'm bragging a little), nothing I've ordered at a restaurant has tasted better than this one pasta dish I made with clams, shrimp, and scallops.
Shrimp and scallops I had no problem with...clams however... If you asked me 3 years ago to eat a clam, I would have laughed and thought you were joking. My boyfriend, being the adventurous eater that he is, convinced me to try it. And guess what? I love them! I love the saltiness, although I do warn that a grain of sand can throw you off at first if you chew too vigorously.
I'm so happy he convinced to me try it, because in addition to clams, he has helped me try many new foods that I've never tried before. I am also proud of myself for being brave enough to try things that once scared me. Hooray for trying new things!
Linguine con vongole (and shrimp and scallops)
1 pound pasta (linguine or angel hair)
1/4 C olive oil
4-5 teaspoons garlic, finely chopped
12 little neck clams (thoroughly cleaned from any sand debris)
1/4 pound shrimp
1/2 pound scallops
3/4 C white wine (Pinot Grigio or Sauvignon Blanc)
1 lemon, juiced
2 tablespoons butter
salt and pepper
1 C fresh parsley, chopped
sprinkle of red pepper flakes (optional)
Bring a large pot of water to a boil. Add the pasta, cook to package instructions, and drain well.
Meanwhile, heat olive oil and butter over medium flame in a deep saute pan. Add the garlic, red pepper flakes if desired, and saute about 2 minutes. Add clams, wine, and lemon juice. Cover the pan with a lid to allow clams to cook. Shake the pan periodically until all the clams have opened up--if some clams have not opened up, remove them from the pan and discard. Add the shrimp and scallops and cook until shrimp is pink and scallops are opaque throughout.
Add the drained pasta to the sauce in the pan, season with salt and pepper, and toss pasta until it is coated with the sauce. Extra olive oil may be used here if necessary. Garnish pasta with the freshly chopped parsley.
Friday, August 9, 2013
Coconut Chocolate Chip Cookies
Hi everyone! It has been very stressful the past couple weeks for me. The lease for my college house ended at the end of July, so I have been busy packing things up and moving things out to go back home. Once I got home, my room looked as if a hurricane came though and I just couldn't deal with the chaos for a few days before I was able to start tackling the mess and organizing it bit by bit.
Before I packed everything away, I had been scanning through my pantry to see what food I could use up... one less thing to take back (and I hate throwing away food). I noticed I had a bag of coconut that I had used just a little bit of for coconut shrimp. I was wondering, what could I use the rest of this coconut for? I knew I wanted it to be something sweet versus savory and I had asked my boyfriend if he wanted any cookies for when I went to visit him.
Enter coconut chocolate chip cookies. Chocolate chip cookies are always a great cookie to make, because who doesn't love them? I thought it would be a fun and interesting twist to incorporate coconut into them as well!
I modified the chocolate chip cookie recipe I normally use and went from there! They were the perfect combination of crunchy on the outside and chewy on the inside.
Coconut Chocolate Chip Cookies
1 1/2 C all-purpose flour
1 teaspoon baking soda
1/2 teaspoon salt
2 sticks unsalted butter
1 C packed brown sugar
1/4 C granulated sugar
2 large eggs
2 teaspoons vanilla
3 1/2 C sweetened coconut flakes
1 1/2 C semi-sweet chocolate chips
Preheat oven to 375 F
Whisk flour, baking soda and salt in a medium sized bowl. Set aside.
Combine softened butter, brown sugar, and granulated sugar in a large bowl and beat until light and fluffy. Beat in eggs, one at a time and until well blended. Add the vanilla. Making sure you scrape down the sides of the bowl. Add the flour mixture a little at a time until well blended. Add the coconut and then the chocolate chips
Drop dough, about 1 inch in diameter onto a lined cookie sheet about 2 inches apart. Depending on your oven, bake 9 to 11 minutes or until golden. Remove from oven and allow cookies to cool on a wire rack or a spare piece of parchment paper.
You can keep these in an airtight container for about a week, although they probably won't even last that long! Cookies are best enjoyed with a glass of milk :)
Before I packed everything away, I had been scanning through my pantry to see what food I could use up... one less thing to take back (and I hate throwing away food). I noticed I had a bag of coconut that I had used just a little bit of for coconut shrimp. I was wondering, what could I use the rest of this coconut for? I knew I wanted it to be something sweet versus savory and I had asked my boyfriend if he wanted any cookies for when I went to visit him.
Enter coconut chocolate chip cookies. Chocolate chip cookies are always a great cookie to make, because who doesn't love them? I thought it would be a fun and interesting twist to incorporate coconut into them as well!
I modified the chocolate chip cookie recipe I normally use and went from there! They were the perfect combination of crunchy on the outside and chewy on the inside.
Coconut Chocolate Chip Cookies
1 1/2 C all-purpose flour
1 teaspoon baking soda
1/2 teaspoon salt
2 sticks unsalted butter
1 C packed brown sugar
1/4 C granulated sugar
2 large eggs
2 teaspoons vanilla
3 1/2 C sweetened coconut flakes
1 1/2 C semi-sweet chocolate chips
Preheat oven to 375 F
Whisk flour, baking soda and salt in a medium sized bowl. Set aside.
Combine softened butter, brown sugar, and granulated sugar in a large bowl and beat until light and fluffy. Beat in eggs, one at a time and until well blended. Add the vanilla. Making sure you scrape down the sides of the bowl. Add the flour mixture a little at a time until well blended. Add the coconut and then the chocolate chips
Drop dough, about 1 inch in diameter onto a lined cookie sheet about 2 inches apart. Depending on your oven, bake 9 to 11 minutes or until golden. Remove from oven and allow cookies to cool on a wire rack or a spare piece of parchment paper.
You can keep these in an airtight container for about a week, although they probably won't even last that long! Cookies are best enjoyed with a glass of milk :)
Friday, July 26, 2013
Turkey Avocado Burgers with Sweet Potato Fries
I've been on an avocado kick recently and have been trying to incorporate it into as many meals as possible. I also do love the occasional burger, however I usually make them with ground turkey instead of beef to slim it down a bit. In addition to being simple to make, you can easily make the patties and store extras in the freezer for a later time!
Turkey Avocado Burgers with Sweet Potato Fries
1 package of lean ground turkey
about 2 tablespoons olive oil
1-2 teaspoons garlic
1/2 white onion, caramelized
1 1/2 teaspoons Worcestershire sauce
salt and pepper
1 sweet potato
1 avocado, sliced
pepper jack cheese
lettuce, tomato, condiments of your choice
Start off by sauteing the onions in olive oil, add in the garlic when the onions are fragrant and starting to brown. Once caramelized, remove from heat and let cool.
In a large bowl, empty the package of ground turkey, add the caramelized onions, Worcestershire sauce, and a pinch of salt and pepper. Mix together, with a spoon or hands (personally I find using your hands to be more efficient, just make sure they're clean). Form patties, depending on how big you make them, set aside the ones to wrap up for the freezer.
Cook patties until the juice runs clear and is pink in the middle (for medium, medium rare), about 2-3 minutes on each side. Cover patties with a slice of pepper jack cheese and allow it to melt.
Arrange patty on bun with lettuce, tomato, and sliced avocado on top.
For the sweet potato fries, preheat the oven to 400F. Wash and slice sweet potato into slivers, or fry-like looking shapes. Toss the sliced sweet potato with a tablespoon or two of olive oil and season with salt and pepper. Arrange on a baking sheet, making sure that the fries are spread out. Cook in the oven for about 15-20 minutes, flip the fries over, and cook for an additional 15-20 minutes depending on how crispy you like your fries!
Enjoy!!
Monday, July 15, 2013
Pasta alla Carbonara
Do you ever open up Pinterest looking for something specific (a recipe in my case) and just get sucked in to your main feed? You just keep on scrolling through, browsing and happily pinning away, then you glance at the time and a half hour has passed and you realize that you have not accomplished anything.
This happens to me frequently. I have a ton of recipes on Pinterest that I have lined up to try out. Sometimes I look beforehand so I can get an idea of what I'll need to get at the grocery store, but sometimes I wait until the last minute and then I'm too hungry to pick up anything and need to eat right at that moment. This is when I resort to something quick and easy.
One of my go-to recipes is Carbonara. I picked this up from my grandma, even I noticed some nights she doesn't feel much like cooking and makes something easy. This is incredibly simple and the perfect recipe to start out with, especially if you're a new cook. Also, it's a recipe that include bacon and eggs, who doesn't love bacon and eggs?!
This happens to me frequently. I have a ton of recipes on Pinterest that I have lined up to try out. Sometimes I look beforehand so I can get an idea of what I'll need to get at the grocery store, but sometimes I wait until the last minute and then I'm too hungry to pick up anything and need to eat right at that moment. This is when I resort to something quick and easy.
One of my go-to recipes is Carbonara. I picked this up from my grandma, even I noticed some nights she doesn't feel much like cooking and makes something easy. This is incredibly simple and the perfect recipe to start out with, especially if you're a new cook. Also, it's a recipe that include bacon and eggs, who doesn't love bacon and eggs?!
Pasta alla Carbonara
Serving size: 2
1/2 lb of pasta (I believe linguine is pictured here, probably because it's what I already had, however I usually use penne for this dish)
4-5 strips of bacon, cut into bite sized pieces (try to find the leanest package)
3-4 eggs, scrambled
1-2 tsp garlic, finely chopped
olive oil
salt
pepper
Start by bringing water to a boil in a medium sized pot and cook your pasta according to their package directions or to "al dente".
Heat up a large skillet and drop the in the bite sized bacon to cook. I generally like my carbonara to be on the bacon heavy side and for them to be extra cripsy. When the bacon is almost cooked to your liking, turn the heat down, and add the finely chopped garlic. Cook for 2-3 more minutes.
By this time, your pasta should be done. Drain your pasta and dump it into the skillet with the bacon and garlic. There should be enough bacon grease to act as a kind of "sauce" but I usually end up using a little bit of olive oil just to make not stick together and not to taste dry.
At this time, take your eggs, which should be scrambled in a bowl and seasoned with salt and pepper, pour the raw eggs over the pasta in the skillet and mix around until the eggs have cooked.
The key to this recipe is to have a large and deep enough skillet to contain and mix all the ingredients. Also, in my personal opinion, the pouring of the raw eggs over the pasta and allowing everything to cook together is what makes this dish. I love when I'm about to eat a penne that has bacon and egg inside of it.
In this last picture, my boyfriend and I had a salad along with our pasta to lighten it up a little bit. I cannot take credit for the salad though because he made it! He used red leaf lettuce, crumbled goat cheese, and Gala apple slices with some of our favorite vinaigrette!
Enjoy!
Monday, July 8, 2013
Vegetarian Wraps with Black Beans, Rice, and Avocado
Hi there! I hope everyone's Fourth of July was wonderful! I had a great time minus the 60+ mosquito bites I got while I was watching the fireworks... Later I found a trick on Pinterest to stop the itching by heating a spoon under hot water and applying pressure to the bite. Apparently it destroys the protein that causes the reaction. I wish I found that sooner! Instead, I remedied myself by going to the beach this past weekend and had the salt water dry them out... which I'm not complaining about. I love beach days!
Anyway, I have a recipe for you tonight. I was looking to make a quick dinner one night and I found a recipe for these wraps. I modified it a bit to suit my taste since the original recipe called for onions and I have to say, I am not a fan of raw onions. This recipe is pretty simple and feel free to modify it however you like!
Vegetarian Wraps with Black Beans, Rice, and Avocado
1 cup rice
1 red pepper, green pepper, and/or yellow pepper (seeded and diced)
1 avocado (peeled and diced)
1 can of black beans (rinsed)
about 1 cup of medium spice salsa (or whichever level of spicyness you prefer)
package of soft burrito/taco tortillas
mexican blend shredded cheese
salt and pepper to taste
*optional: low fat sour cream and salsa on the side
Cook the rice according to package directions. I believe I used Carolina long grain white rice.
Prepare the peppers and black beans. Combine all ingredients in a large mixing bowl, saving the avocado for last so it doesn't get too beat up during the mix.
Prepare your tortilla. Spread some sour cream and shredded cheese on your warm tortilla. Take a few spoonfuls of your mixture into the center of the tortilla. Fold the tortilla according to directions on the packaging. In a warm pan lay the wrap seam side down. You can cover the pan with a lid to heat it up and melt the cheese faster.
Enjoy for the next few days! These make perfect leftovers, just make sure the avocado doesn't get too brown.
As a variation, you could opt to leave it without tortilla and serve as a side dish! I did that for my graduation party, everyone loved it!
Anyway, I have a recipe for you tonight. I was looking to make a quick dinner one night and I found a recipe for these wraps. I modified it a bit to suit my taste since the original recipe called for onions and I have to say, I am not a fan of raw onions. This recipe is pretty simple and feel free to modify it however you like!
Vegetarian Wraps with Black Beans, Rice, and Avocado
1 cup rice
1 red pepper, green pepper, and/or yellow pepper (seeded and diced)
1 avocado (peeled and diced)
1 can of black beans (rinsed)
about 1 cup of medium spice salsa (or whichever level of spicyness you prefer)
package of soft burrito/taco tortillas
mexican blend shredded cheese
salt and pepper to taste
*optional: low fat sour cream and salsa on the side
Cook the rice according to package directions. I believe I used Carolina long grain white rice.
Prepare the peppers and black beans. Combine all ingredients in a large mixing bowl, saving the avocado for last so it doesn't get too beat up during the mix.
Prepare your tortilla. Spread some sour cream and shredded cheese on your warm tortilla. Take a few spoonfuls of your mixture into the center of the tortilla. Fold the tortilla according to directions on the packaging. In a warm pan lay the wrap seam side down. You can cover the pan with a lid to heat it up and melt the cheese faster.
Enjoy for the next few days! These make perfect leftovers, just make sure the avocado doesn't get too brown.
As a variation, you could opt to leave it without tortilla and serve as a side dish! I did that for my graduation party, everyone loved it!
Wednesday, July 3, 2013
Hi there!
I'm back!!
I've been trying to teach myself HTML and website design, however it's a lot harder than I imagined! I'm also torn between two different color schemes for this blog... I might just have to choose one out of a hat or I'll never be able to decide.
I wanted to share some of my plans for this blog because I'm thinking of changing it up a bit. I still love food and I will still be posting lots of recipes I try out and enjoy. However, I do have other passions in my life that I would like to explore here.
Food has always been my number one because of how I grew up. I never ate "children's cereal" as a child and very rarely did I eat fast food or drink soda (usually only if I was with friends). When I was younger, I used to resent my family for not letting me have the kinds of things all my friends would talk about or be eating for lunch at school. Remember in My Big Fat Greek Wedding when Toula had a flashback to when she was young and all of her school friends would be eating wonderbread sandwiches while she had a thermos of homemade soup from the night before? That was me. I had a thermos of soup I brought for lunch... or lamb, or pasta.. you get the idea. I was Toula. I used to be embarrassed to eat my lunch when everyone around me was having PB&J sandwiches with the crusts cut off. Now that I am older, I am thankful that I ate so well growing up because it has influenced how I eat and how I cook for myself now.
Just recently I had a party with my family and friends to celebrate my college graduation. My aunts and I all pooled together to make food for this gathering of almost 50 people. All of my friends that came and ate dinner were raving about how delicious everything was and that they wished the food they were enjoying was their baseline for food quality. I guess it was naive of me to think, but I had always thought that everyone ate as well as my family does. I realize now that's not the case and part of the reason I want to share my recipes is because my goal is to inspire others to eat well.
One of my other passions is cosmetics. I remember when I was younger I would try to get my hands on any makeup products I could, even if it didn't look good on me. For my 13th birthday, one of my aunts took me to the Clinique counter and bought me a tinted moisturizer, mascara, and lavender eyeshadow. It was one of the best days of my life; I finally had real makeup! Since then I've been hooked. I'm very brand loyal to Clinique, but I do have many different products from many different brands (I probably own way more makeup than I care to admit). I'm a sucker for YouTube Beauty Gurus and I thought, "Hey, I can do that"! So I decided until I invest in a quality camera, I will be content with writing beauty and fragrance posts.
Another passion that I intend to explore here is nothing in particular like food or cosmetics, but anything that is lovely in general. I come across many things I like on Pinterest and even have a board titled "Pretty Things" which can include flowers, jewelry, fashion, lace, and many other girly type of things.
I hope you all are okay with me changing my blog up a bit! Obviously, this also calls for a name change, but I still haven't thought of one I really like. Stay posted for that!
I've been trying to teach myself HTML and website design, however it's a lot harder than I imagined! I'm also torn between two different color schemes for this blog... I might just have to choose one out of a hat or I'll never be able to decide.
I wanted to share some of my plans for this blog because I'm thinking of changing it up a bit. I still love food and I will still be posting lots of recipes I try out and enjoy. However, I do have other passions in my life that I would like to explore here.
Food has always been my number one because of how I grew up. I never ate "children's cereal" as a child and very rarely did I eat fast food or drink soda (usually only if I was with friends). When I was younger, I used to resent my family for not letting me have the kinds of things all my friends would talk about or be eating for lunch at school. Remember in My Big Fat Greek Wedding when Toula had a flashback to when she was young and all of her school friends would be eating wonderbread sandwiches while she had a thermos of homemade soup from the night before? That was me. I had a thermos of soup I brought for lunch... or lamb, or pasta.. you get the idea. I was Toula. I used to be embarrassed to eat my lunch when everyone around me was having PB&J sandwiches with the crusts cut off. Now that I am older, I am thankful that I ate so well growing up because it has influenced how I eat and how I cook for myself now.
Just recently I had a party with my family and friends to celebrate my college graduation. My aunts and I all pooled together to make food for this gathering of almost 50 people. All of my friends that came and ate dinner were raving about how delicious everything was and that they wished the food they were enjoying was their baseline for food quality. I guess it was naive of me to think, but I had always thought that everyone ate as well as my family does. I realize now that's not the case and part of the reason I want to share my recipes is because my goal is to inspire others to eat well.
One of my other passions is cosmetics. I remember when I was younger I would try to get my hands on any makeup products I could, even if it didn't look good on me. For my 13th birthday, one of my aunts took me to the Clinique counter and bought me a tinted moisturizer, mascara, and lavender eyeshadow. It was one of the best days of my life; I finally had real makeup! Since then I've been hooked. I'm very brand loyal to Clinique, but I do have many different products from many different brands (I probably own way more makeup than I care to admit). I'm a sucker for YouTube Beauty Gurus and I thought, "Hey, I can do that"! So I decided until I invest in a quality camera, I will be content with writing beauty and fragrance posts.
Another passion that I intend to explore here is nothing in particular like food or cosmetics, but anything that is lovely in general. I come across many things I like on Pinterest and even have a board titled "Pretty Things" which can include flowers, jewelry, fashion, lace, and many other girly type of things.
I hope you all are okay with me changing my blog up a bit! Obviously, this also calls for a name change, but I still haven't thought of one I really like. Stay posted for that!
Cookie Comfort
****In honor of the Fourth of July being well, today as I edit this post, I thought it was appropriate to post something that celebrated America like these All-American Chocolate Chip cookies!****
There's something comforting about walking into a room or a house that smells like cookies baking in the oven. It's a warm, inviting aroma that entices you to wait until the cookies are cool enough to eat.... and then devour about ten of them.
I decided to make cookies today and I seem to had forgotten about the certain sweet smell of them baking in the oven. I only did notice the aroma when I ran outside for a quick second and when I walked back into the kitchen--BAM sweet warm smelling chocolate chip cookies in the oven waiting for me to enjoy with a cold glass of milk.
I also had forgotten how difficult it was to make cookies by hand! I couldn't use an electric mixer because the one that I have is on it's last leg and might have spontaneously combusted while using it, so I mixed everything by hand with a wooden spoon! This might not be so difficult for some people, but I'm a pretty small girl and after adding over two cups of flour, the dough gets pretty tough to mix!
I know there are a ton of chocolate chip cookies recipes out there, but to me, this type of cookie never gets old. It's a classic cookie that pretty much everyone on the face of the planet loves. When I make them, I usually use the same two recipes every time, but for whatever reason they come out looking different each time! This time they are pretty tall and a bit cakey (which I'm not complaining about!). One recipe I use is from my aunt and the other is from a cookbook called The Cookie Cookbook, which is the recipe I used this time.
All-American Chocolate Chip Cookies
2 1/2 cups all purpose flour
1 teaspoon baking soda
1/2 teaspoon salt
1 cup butter
1 cup packed brown sugar
1/2 cup granulated sugar
2 eggs
1 tablespoon vanilla
1 pack semisweet chocolate chips
Preheat to 350 F
Mix together flour, baking soda, and salt in a medium sized bowl
Cream together butter, granulated sugar, and brown sugar. Beat in eggs and vanilla. Add the flour (I did in 3 segments) to the butter mixture until well blended. Stir in the chocolate chips.
Drop dough about 1/2 in in diameter onto lined cookies sheet (I used parchment paper) and bake for about 12-14 minutes or until golden looking. Transfer to a cooling rack (or onto another piece of parchment paper) and enjoy once cool enough to eat!
Monday, October 22, 2012
Spinach and Cheese Casserole
So, this isn't really a casserole (I don't even know what a casserole actually consists of), but ever since I can remember my grandmother has called this baked ziti dish "casserole". I didn't really care what she called it when she made it though, because baked pasta is an absolute favorite of mine!
Normally, she just uses ricotta, mozzarella, and pasta as the main ingredients, but I decided to add some spinach in because I love it (and I also had some left over in the freezer).
Ingredients
1 small pack frozen spinach (thawed)
1 box pasta of your choice (I used penne)
1 small carton of fat free ricotta
about 6 slices of part skim mozzarella
olive oil
salt
pepper
Preheat oven to 400 degrees F
Bring a pot of water to boil to cook the pasta in (add salt obviously). Cook just under al dente. In a baking dish, drizzle some olive oil to coat the dish to prevent the pasta from sticking.
In a large bowl combine the spinach, ricotta, cooked pasta, and a dash of pepper. You can use more salt at your discretion, I used just a bit to salt the spinach and ricotta. Mix together then transfer into the baking dish. Drizzle with more oil (as it serves as a kind of make-shift sauce) and place the slices of mozzarella on top. Bake in the over for about 15-20 minutes or until the cheese has melted and started to crisp.
Enjoy!!
Sunday, August 5, 2012
Stay in Chinese Food: Orange Teriyaki Chicken and Fried Rice
Hey everyone! I love chinese food but even if it's usually super cheap, I just can't afford it whenever I want it on a college budget. SOO I found these recipes that are almost as good as the real thing. On the menu: Orange Teriyaki Chicken with Fried Rice.
Fried Rice Recipe
Ingredients (mine were lacking from the original recipe because I didn't have some ingredients)
Lower the heat to about medium and add the eggs.
Scramble the eggs until cooked
Next time I make this rice, I'll edit to include everything else I use... bean sprouts and baby corn perhaps? Those are my favorites!
And here's how to make it!!
Orange Teriyaki Chicken Recipe
Ingredients
2 tablespoons olive oil
1/2 tablespoon ginger
1 tablespoon orange zest
1 garlic clove, minced
1/4 cup rice vinegar
3 tablespoons soy sauce
2 tablespoons sugar
2 tablespoons orange marmalade
1 tablespoon freshly squeezed orange juice
1 tablespoon honey
pinch of red pepper flakes
1 1/4 lb boneless, skinless chicken thighs, cut into bite sized pieces
1 tablespoon orange zest
1 garlic clove, minced
1/4 cup rice vinegar
3 tablespoons soy sauce
2 tablespoons sugar
2 tablespoons orange marmalade
1 tablespoon freshly squeezed orange juice
1 tablespoon honey
pinch of red pepper flakes
1 1/4 lb boneless, skinless chicken thighs, cut into bite sized pieces
Sauce: over medium heat, add the olive oil. Next add the ginger, orange zest, and garlic. The original recipe calls for fresh ginger, but I didn't have any on hand so I just used ground ginger from a container. If you do this too, make sure you use less than what the original recipe says, otherwise it'll have too strong a ginger taste.
Cook for about 1-2 minutes while stirring. Add the rice vinegar, soy sauce, sugar, orange marmalade, orange juice, honey, and pepper flakes. I didn't really measure out a pinch for that either. I just sprinkled until I thought it was spicy enough. Bring to a simmer and allow to simmer for about 5 minutes to thicken the sauce. Separate half of the sauce into another bowl to serve with cooked chicken.
Here's what the sauce looked like when done:
Unfortunately, I don't have a grill... so I settled for the good old George Foreman counter grill haha.
Place the chicken on the grill and brush the sauce once the pieces have started to cook, turning over every few minutes. I added more sauce every time I turned the pieces also, trying to get them extra yummy. Depending on how thick the pieces are, they should take about 5 minutes.
Here they are finished:
Fried Rice Recipe
Ingredients (mine were lacking from the original recipe because I didn't have some ingredients)
3 cups cooked white rice (translates to 1 cup uncooked rice)
3 tbs sesame oil
1 cup frozen peas and corn (defrosted)
2 tsp minced garlic
2 eggs, slightly beaten
1/4 cup soy sauce
On medium-high heat, heat the sesame oil in a large pan. Add the vegetables and garlic and fry until tender.
Lower the heat to about medium and add the eggs.
Scramble the eggs until cooked
Add the rice and soy sauce and mix together well. Keep this on the fire until it is thoroughly heated.
Next time I make this rice, I'll edit to include everything else I use... bean sprouts and baby corn perhaps? Those are my favorites!
Wednesday, August 1, 2012
Update and Sopapilla Cheesecake
Happy first day of August!! I've been a flake again, I apologize.... but not to worry! I've made lots of things so expect to see several updates coming from me this week!
First order of business, do you like my new background/banner?! I did it last night when I should have been working on my paper, but I found the background and just needed to change it right then. It's not pink, but I still really like it. Damask is one of my favorite patterns!
Second, has anyone been watching the Olympics? Because I have been watching them like it's my job. I teared up twice yesterday when I watched the fab five won gold, once live in the morning and again in the evening for the rerun. Oh and again when the Brits won their first gold by the rowing girls. Good grief.
Now on to the dessert....
Quite possibly the easiest adaptation of cheesecake ever created: the Sopapilla Cheesecake! yum yum just look at those, I wish I still had some!
Spread the mixture over the over the dough strips
Original Recipe
First order of business, do you like my new background/banner?! I did it last night when I should have been working on my paper, but I found the background and just needed to change it right then. It's not pink, but I still really like it. Damask is one of my favorite patterns!
Second, has anyone been watching the Olympics? Because I have been watching them like it's my job. I teared up twice yesterday when I watched the fab five won gold, once live in the morning and again in the evening for the rerun. Oh and again when the Brits won their first gold by the rowing girls. Good grief.
Now on to the dessert....
Quite possibly the easiest adaptation of cheesecake ever created: the Sopapilla Cheesecake! yum yum just look at those, I wish I still had some!
Ingredients
2 cans of Pillsbury crescent rolls
2 8oz Neufchâtel cheese, softened
1 cup sugar
1 teaspoon vanilla
1/4 cup butter
Cinnamon and sugar, to sprinkle
Preheat to 350 degrees F
I bought the rolls that came out in strips, so what I did was stretched the strips out both length and width wise of one can of rolls and pressed them together (as to not leave any gaps between strips) on to an ungreased pan. I couldn't tell you what the exact measurements of this pan are but my guess is 9x13. Then, combine the cheese, sugar, and vanilla in a separate bowl.
I used Neufchâtel cheese because it's 1/3 less the fat of regular cream cheese, but when I was in the store the other day I noticed that the reduced fat cream cheese is 1/2 the fat. So next time I'm just going to used the low fat cream cheese, you could use either though. Neufchâtel cheese tastes almost exactly the same as cream cheese and no one noticed when I served them this cheesecake ;)
Unroll the second can of crescent rolls over the cream cheese mixture using the same procedure to stretch it out as before. Melt the bit of butter and spread over top and sprinkle cinnamon and sugar. I didn't do this part by measurement, just sprinkled what I thought was enough. It looks like a lot of sugar in the before photo but it came out perfect.
Bake at 350 degree F for 20-30 minutes. You can also tell when it looks done. The dough looks cripsy and not squishy like before. I must tell you that this smelled absolutely irresistible. Even while it was in the oven, I wish my house smelled like these all day long.
Original Recipe
Sunday, July 15, 2012
Zucchini Bread
This past Friday afternoon, a lady that lives down my street brought my grandmother these giant zucchinis growing in her yard. At this point, my grandmother had about 6 zucchinis already in the fridge, some from our neighbor and some from our garden. And as nice as the gesture was, she didn't know what to do with all of these zucchinis! Especially since she had already made zucchini soup this week!
So yesterday morning I was looking through my recipe binder, that contains all sorts of recipes from all sorts of people, and found one from my aunt for zucchini bread. Thus begins the making of zucchini bread with my grandmother. And the best part about this is.... one slice is LESS than 100 calories!! As long as you don't consider half of the loaf as 1 slice that is... and after trying the bread it might actually come to that!
Ingredients
3 cups shredded zucchini
1 2/3 cups sugar
2/3 cup olive oil (I ALWAYS, ALWAYS use olive oil, except for cookies- then butter is acceptable), but regular- not extra virgin
2 teaspoons vanilla
4 eggs
3 cups all purpose flour
2 teaspoons baking soda
1 teaspoon salt
1 teaspoon ground cinnamon
1/2 teaspoon ground cloves (I didn't have cloves so I left it out- it's such a small amount anyway)
1/2 teaspoon baking powder
1/2 chopped nuts (or chocolate chips if you desire, like me, and I probably added about 1 1/2 cups hehe)
Preheat the oven to 350 degrees F and grease the bottom of two loaf pans (9x5x3 roughly).
Shred the zucchini, my grandmother peeled off the skin and used a cheese grater (and take our the seeds as well of course). PS. LOOK at the SIZE of that zucchini!! It's larger than our toaster!!
Three cups for us what a little less than one large zucchini, the one we used was slightly smaller than the one pictured above. But if I had to guess I would say 3 cups is about 2-3 medium sized zucchini.
In a large bowl, mix the zucchini, sugar, oil, vanilla, and eggs until well combined. I didn't even beat the eggs before putting them in the bowl... just add it allll in
Here's what it looked like after all the wet + sugar additions:
Then in a smaller bowl add the flour, baking soda, baking powder, salt, cinnamon and mix with fork or whisk until well combined and add to the wet mixture.
Now it's time to add in the yummy chocolate chips! I used semi-sweet by the way.
Pour the batter into the pans and bake 50 to 60 minutes- mine were in for about 60 minutes until the toothpick came out clean. When they're done remove from oven and cool for about 10-20 minutes then loosen from the pans and remove. Allow the bread to cool completely before digging in!
It was still breakfast time so I enjoyed a slice of mine with some freshly cut strawberries!
So yesterday morning I was looking through my recipe binder, that contains all sorts of recipes from all sorts of people, and found one from my aunt for zucchini bread. Thus begins the making of zucchini bread with my grandmother. And the best part about this is.... one slice is LESS than 100 calories!! As long as you don't consider half of the loaf as 1 slice that is... and after trying the bread it might actually come to that!
Ingredients
3 cups shredded zucchini
1 2/3 cups sugar
2/3 cup olive oil (I ALWAYS, ALWAYS use olive oil, except for cookies- then butter is acceptable), but regular- not extra virgin
2 teaspoons vanilla
4 eggs
3 cups all purpose flour
2 teaspoons baking soda
1 teaspoon salt
1 teaspoon ground cinnamon
1/2 teaspoon ground cloves (I didn't have cloves so I left it out- it's such a small amount anyway)
1/2 teaspoon baking powder
1/2 chopped nuts (or chocolate chips if you desire, like me, and I probably added about 1 1/2 cups hehe)
Preheat the oven to 350 degrees F and grease the bottom of two loaf pans (9x5x3 roughly).
Shred the zucchini, my grandmother peeled off the skin and used a cheese grater (and take our the seeds as well of course). PS. LOOK at the SIZE of that zucchini!! It's larger than our toaster!!
Three cups for us what a little less than one large zucchini, the one we used was slightly smaller than the one pictured above. But if I had to guess I would say 3 cups is about 2-3 medium sized zucchini.
In a large bowl, mix the zucchini, sugar, oil, vanilla, and eggs until well combined. I didn't even beat the eggs before putting them in the bowl... just add it allll in
Here's what it looked like after all the wet + sugar additions:
Then in a smaller bowl add the flour, baking soda, baking powder, salt, cinnamon and mix with fork or whisk until well combined and add to the wet mixture.
Now it's time to add in the yummy chocolate chips! I used semi-sweet by the way.
Pour the batter into the pans and bake 50 to 60 minutes- mine were in for about 60 minutes until the toothpick came out clean. When they're done remove from oven and cool for about 10-20 minutes then loosen from the pans and remove. Allow the bread to cool completely before digging in!
It was still breakfast time so I enjoyed a slice of mine with some freshly cut strawberries!
Saturday, July 14, 2012
Roasted Red Pepper and Goat Cheese Pasta
I found this recipe online and have been waiting to try it out because it sounded so delicious. Mostly because I love peppers, goat cheese, and pasta. Not only that but it was really easy to make.
Some tips before you get started though (I'll definitely be keeping these in mind next time I make it though... lessons learned haha): don't start the cream sauce until after the red peppers are roasted and cooling down- maybe even wait until you have them peeled and cleaned. Make sure you get FAT FREE half and half (I couldn't find a small container of it in the supermarket so I just got regular. But it will definitely be easier on your waistline). Time the cooking of the pasta right when you're done blending the sauce so you can pour it in without the pasta sticking together (I used linguine fine and it was done in 6 minutes).
Ingredients
2 whole red bell peppers
2 tablespoons olive oil
1 small onion, diced
2 cloves garlic, minced
1 cup fat free half & half
about 4 oz. herb goat cheese (if you can't find the small package)
2/3 cup grated parigiano reggiano cheese
1 lb linguine, cooked to al dente
salt & pepper, to taste
handful of parsley (optional)
Here's what you do:
Preheat the oven to 500 degree F, put foil on a baking sheet, place peppers on sheet, and bake for 30 minutes. Remove and let cool for about 10 or until you can handle peeling the skin off without burning your fingers off.
Add the half and half, goat cheese, salt, pepper, and parm, stir until cheese is melted over low heat.
Pepper should be peeled and seedless and cut into strips. Add them to the sauce as well.
Remove from heat and blend together. I don't have a food processor so I just used a regular ol'blender. Put back into the pan to keep warm until pasta is done.
Add pasta to the sauce and coat thoroughly. Add some more parm cheese and parsley if you desire, like me!
Some tips before you get started though (I'll definitely be keeping these in mind next time I make it though... lessons learned haha): don't start the cream sauce until after the red peppers are roasted and cooling down- maybe even wait until you have them peeled and cleaned. Make sure you get FAT FREE half and half (I couldn't find a small container of it in the supermarket so I just got regular. But it will definitely be easier on your waistline). Time the cooking of the pasta right when you're done blending the sauce so you can pour it in without the pasta sticking together (I used linguine fine and it was done in 6 minutes).
Ingredients
2 whole red bell peppers
2 tablespoons olive oil
1 small onion, diced
2 cloves garlic, minced
1 cup fat free half & half
about 4 oz. herb goat cheese (if you can't find the small package)
2/3 cup grated parigiano reggiano cheese
1 lb linguine, cooked to al dente
salt & pepper, to taste
handful of parsley (optional)
Here's what you do:
Preheat the oven to 500 degree F, put foil on a baking sheet, place peppers on sheet, and bake for 30 minutes. Remove and let cool for about 10 or until you can handle peeling the skin off without burning your fingers off.
Then start the sauce by chopping the onions and garlic and saute in olive oil until tender.
Remove from heat and blend together. I don't have a food processor so I just used a regular ol'blender. Put back into the pan to keep warm until pasta is done.
Add pasta to the sauce and coat thoroughly. Add some more parm cheese and parsley if you desire, like me!
Enjoy!!
Friday, June 29, 2012
Peanut Butter Chocolate No Bake Dessert
I'm not even
sure what do call this dessert but it is delicious! I also love that
it was no bake- perfect for a hot summer day and you're looking for
something sweet to eat. Unfortunately someone dug into it before I did,
attempted to make it look like they didn't, and put it back in the
fridge. But, I guess a good thing about this picture is that you can
see the layers of the dessert.
Ingredients
Procedure
Crush about 20 cookies and toss together with the softened butter. Press into a 9x9 dish (mine was slightly larger) to form a sort of 'crust'. In a separate large bowl, beat the cream cheese, peanut butter, and 1 cup of the confectioners sugar until smooth. Fold in half of the whipped topping and spread over the crust. Chop up the mini peanut butter cups and sprinkle over top of the peanut butter and cream cheese layer.
In another large bowl, beat milk, pudding mix, and the rest of the confectioners sugar on low for 2 minutes. Let stand for 2 minutes and fold in the remaining whipped topping. Spread over the mini peanut butter cups. Crush the rest of the cookies and sprinkle on top- if you have any left over peanut butter cups sprinkle those as well. Cover and chill for at least 3 hours before you dig in! Also, as if this dessert couldn't get any better, it tasted even better the following night. There's just one thing that I would change next time I make it would be the amount of peanut butter. It was just a littlleeee too thick and I think the peanut butter was to blame. Other than that, enjoy!!
Link to original recipe here
Ingredients
- 1 package of Oreos, or any other kind of cream-filled sandwich cookies
- 2 tbs of softened butter
- 1 package (8 oz) of cream cheese, softened
- 1/2 cup peanut butter
- 1-1/2 cups confectioners sugar
- 16 oz of frozen whipped topping
- 15-20 mini peanut butter cups
- 1 cup milk
- 1 small package of instant chocolate pudding mix
Procedure
Crush about 20 cookies and toss together with the softened butter. Press into a 9x9 dish (mine was slightly larger) to form a sort of 'crust'. In a separate large bowl, beat the cream cheese, peanut butter, and 1 cup of the confectioners sugar until smooth. Fold in half of the whipped topping and spread over the crust. Chop up the mini peanut butter cups and sprinkle over top of the peanut butter and cream cheese layer.
In another large bowl, beat milk, pudding mix, and the rest of the confectioners sugar on low for 2 minutes. Let stand for 2 minutes and fold in the remaining whipped topping. Spread over the mini peanut butter cups. Crush the rest of the cookies and sprinkle on top- if you have any left over peanut butter cups sprinkle those as well. Cover and chill for at least 3 hours before you dig in! Also, as if this dessert couldn't get any better, it tasted even better the following night. There's just one thing that I would change next time I make it would be the amount of peanut butter. It was just a littlleeee too thick and I think the peanut butter was to blame. Other than that, enjoy!!
Link to original recipe here
Wednesday, June 27, 2012
Mustard Roasted Salmon with Zucchini Chips
So, here's the first official food post:
I was craving salmon the other night, which is strange because I'm not much of a fish eater. But nonetheless, I gave into my craving and searched for different salmon recipes. I found a couple, but there was only one that used simple ingredients and still looked good.
So I went out and bought a pound wild Alaskan salmon and this was the result:
I also apologize for the picture, I realize it's not the best photo. The salmon also broke when I took it out of the pan, I was quite upset.
But to make up for my terrible picture taking skills (which I promise will get better) here was how I made it:
Ingredients
Preheat your oven to 400 degrees Fahrenheit. I lined my baking sheet with aluminum foil, which may have aided in the process of breaking my salmon, next time I'll grease it with a bit of olive oil. Season the salmon with salt and pepper and pop it in the oven for 10 minutes.
While the salmon is cooking combine the mustard, maple syrup, garlic, and lemon juice and mix well. After the ten minutes are up, put the mixture on the salmon and continue to bake for another 10 minutes. The original recipe called for only 5 minutes, but I took user's comments seriously and used the extra 5 minutes in the oven.
Besides maybe salting the salmon a little too much, I was pretty happy with the way it turned out. I didn't actually use a measuring spoon for the ingredients, just a soup spoon. But regardless, it had a nice tangy-sweet flavor and was cooked perfectly. If I hadn't done the extra five minutes it would have been entirely too wet and anymore would most likely have dried it out.
The side dish I made to go along with it (in addition to brown rice) were these very yummy zucchini chips. I love zucchini anyway it's cooked, but these just looked too good to be true, so obviously I had to try it.
Ingredients
Since my oven was already heated to 400 degrees, I just kept it at that (I even had them in there while the salmon was cooking). I lined another baking sheet with aluminum foil, which turned out to be another lesson of having to grease beforehand.
Anyway, so after washing and slicing the zucchini, mix together the milk and flour in a large bowl (I actually thought this was too much and ended up throwing most of it away- next time I'll cut them down) and mix the breadcrumbs and cheese together in a separate bowl. Dredge the slices of zucchini through the flour and milk mixture then coat them evenly in the breadcrumb and cheese mixture. Place them on the baking sheet and bake for 30 minutes. The chips are supposed to be turned over halfway through baking, but I couldn't since they were sticking, although they still turned out browned and crispy.
So, that's what I made for dinner and overall I was pretty happy with all of it. Here are the links to the original recipes if you're interested:
Zucchini Chips
Mustard Roasted Salmon
I was craving salmon the other night, which is strange because I'm not much of a fish eater. But nonetheless, I gave into my craving and searched for different salmon recipes. I found a couple, but there was only one that used simple ingredients and still looked good.
So I went out and bought a pound wild Alaskan salmon and this was the result:
I also apologize for the picture, I realize it's not the best photo. The salmon also broke when I took it out of the pan, I was quite upset.
But to make up for my terrible picture taking skills (which I promise will get better) here was how I made it:
Ingredients
- 1 lb of salmon (I guess you could use whatever salmon you'd like- I got wild Alaskan)
- about 2 tbs of mustard (I used a smooth Dijon)
- about 2 tbs of maple syrup (real maple syrup that is)
- about one clove of garlic (I used the already finely chopped one in the jar)
- 1/2 freshly squeezed lemon juice
- salt and pepper
Preheat your oven to 400 degrees Fahrenheit. I lined my baking sheet with aluminum foil, which may have aided in the process of breaking my salmon, next time I'll grease it with a bit of olive oil. Season the salmon with salt and pepper and pop it in the oven for 10 minutes.
While the salmon is cooking combine the mustard, maple syrup, garlic, and lemon juice and mix well. After the ten minutes are up, put the mixture on the salmon and continue to bake for another 10 minutes. The original recipe called for only 5 minutes, but I took user's comments seriously and used the extra 5 minutes in the oven.
Besides maybe salting the salmon a little too much, I was pretty happy with the way it turned out. I didn't actually use a measuring spoon for the ingredients, just a soup spoon. But regardless, it had a nice tangy-sweet flavor and was cooked perfectly. If I hadn't done the extra five minutes it would have been entirely too wet and anymore would most likely have dried it out.
The side dish I made to go along with it (in addition to brown rice) were these very yummy zucchini chips. I love zucchini anyway it's cooked, but these just looked too good to be true, so obviously I had to try it.
Ingredients
- 2 medium sized zucchini, sliced (apparently they're called 'green squash' in the supermarkert- I had no idea)
- 1/4 cup breadcrumbs (I just used plain)
- 1/4 cup grated Parmesan cheese
- 1/2 cup whole wheat flour
- 1 cup milk
Since my oven was already heated to 400 degrees, I just kept it at that (I even had them in there while the salmon was cooking). I lined another baking sheet with aluminum foil, which turned out to be another lesson of having to grease beforehand.
Anyway, so after washing and slicing the zucchini, mix together the milk and flour in a large bowl (I actually thought this was too much and ended up throwing most of it away- next time I'll cut them down) and mix the breadcrumbs and cheese together in a separate bowl. Dredge the slices of zucchini through the flour and milk mixture then coat them evenly in the breadcrumb and cheese mixture. Place them on the baking sheet and bake for 30 minutes. The chips are supposed to be turned over halfway through baking, but I couldn't since they were sticking, although they still turned out browned and crispy.
So, that's what I made for dinner and overall I was pretty happy with all of it. Here are the links to the original recipes if you're interested:
Zucchini Chips
Mustard Roasted Salmon
Subscribe to:
Posts (Atom)